Designing a school cone: individual for the start of school
The first day of school is an unforgettable experience. That's why designing a school cone plays an important role. Everyone will remember the first day when they stood excitedly with their school cone in the primary school waiting for their name to be called and their class to be introduced.
For many, that day was decades ago and now it's time for their child to start school. For this occasion, you want to create a beautiful and unique school cone for your child. The only question is how to decorate such a school cone and what materials are needed. There is also a lack of creative ideas when it comes to designing school cones.
We at Fotoalben Discount are experts in the field of design. In addition to all the products you need when designing photo memories, we also offer helpful tips and tricks that make designing school cones, photo memories and guest books a breeze. This also makes school cone design a success and can be captured in the form of photos.
In this blog post you will find ideas for school cone design. Make the first day of school an unforgettable experience for your child!
Designing the school cone step by step
Before you can actually design the school cone, you first have to make the basic shape. Once the foundation is set, you can decorate the school cone - for boys or girls, according to your child's preferences.
Before you can design the school cone, you will need the following materials for the base:
- Thick cardboard (size at least DIN A3)
- Coloured crepe paper
- Scissors
- Stapler
- Glue
- Clay paper
- Ribbon
The first step is to determine the shape of the school cone. The classic shape is the funnel shape. For this you need the large piece of cardboard in a colour of your choice. You can achieve the shape of the funnel with a simple trick:
Tie a string to a pencil. Hold the end of the string at one corner of the cardboard and draw a semicircle with the tied pencil. Now all you have to do is cut along the curve and the basic shape is achieved.
Before you start designing the school cone, the second step is to roll up the cardboard. To keep the cardboard in the desired funnel shape, you can use double-sided adhesive tape. Attach the tape to one edge of the cardboard. Then the bag will hold by itself when rolled into the shape of the funnel.
In the next step of the school cone design, let's move on to the colourful collar of the cone. This is where the crepe paper comes in. The crepe paper should fit perfectly around the round opening of the bag. Do not stretch the paper too much or it may tear. You can also attach the crepe paper to the edge with double-sided tape. After filling the school cone, tie it at the top with crepe paper tape in different colours so that nothing can fall out.
If you want to design a school cone, you only need three simple steps for the basic shape. Now the only question is which ideas and designs are suitable for your child. When decorating a school cone, girls still prefer different motifs than boys. So if you want to design a school cone that your child will like, you should let your child's interests flow into the design.
Creative ideas for designing school cones
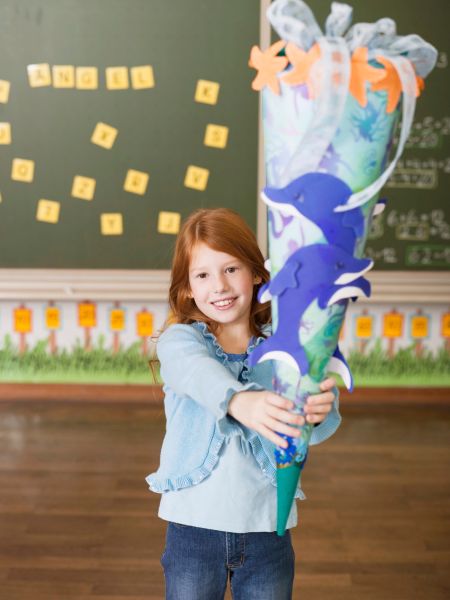
Both boys and girls can design school cones that depict animals. For example, you can easily put a funny lion as a motif on your child's school cone.
For this, a suitable colour should already be chosen when designing the base, such as a light orange-brown tone. After the school cone has been made in your basic shape, you can glue two funny googly eyes onto the cone and use coloured paper to make a nose, mouth and whiskers. You can make the lion's wild mane either out of paper or cotton wool. For the cotton wool version, you need to dye it and then attach it to the school cone with glue.
A school cone dedicated to bees is also suitable for the first grader. For this, glue black strips onto a yellow base shape. Use a black felt-tip pen to create a face on pink paper; googly eyes are also a good way to design the school cone. The bee's antennae can be made from pipe cleaners.
You can also use black paper or pipe cleaners to make little arms for the bee, which you can attach to the sides of the school cone. You can now attach flowers that you have made yourself to the free ends of the pipe cleaners. This is how quickly you can create a school cone that can also prevent the fear of bees.
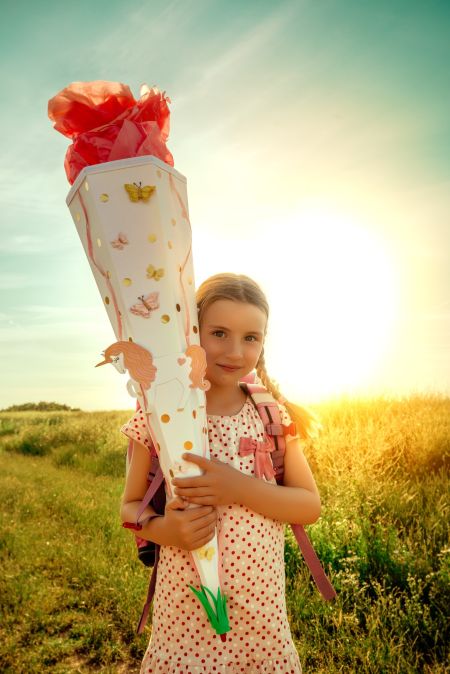
Similar to school bags and clothes, there are also different trends in school cone design. If you are decorating a school cone for a girl, fairies, mermaids and unicorns or horses are very popular motifs. On Pinterest in particular, you will find many unusual, but also complex craft instructions to meet your daughter's girlish dreams.

When it comes to designing school cones for boys, the classic football school cone is still a hit. But pirates or funny monsters have also always been popular with little men. Dinos are also suitable for representing courage and the desire to discover on the first day of school.
Of course, there are also gender-neutral motifs for designing a school cone. These include school cones that depict motifs such as planets, stars and rockets. But also animals such as butterflies or the child's favourite animal are perfect for the school cone. Also suitable for both sexes is the decoration with garlands and pompoms without a specific motif.
Another idea for school cone design is to stick the child's name, photos and stickers or similar sticky motifs on the cone that reflect the child's personality and interests. In this way, you can create a school cone that is highly individual and memorable.
Be inspired by the different ideas for creating a school cone. Enjoy a craft afternoon for yourself or get creative together with your children. There are no limits to your imagination when designing a school cone.


